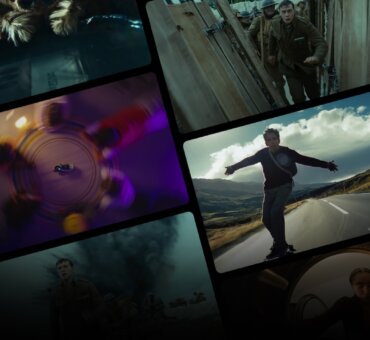
They say the devil is in the details. Well, the magic is there too. That’s what Andrew Finch discovered during the 4-year process of making his space-disaster masterpiece, Others Will Follow. “I always like to get as close to reality as I can,” Andrew told us, while explaining the obsessive lengths he went to when making sure every detail of his models and sets were accurate to the film’s fictional mission. “It’s incredible how much a passive viewer knows how things should be. If you do it wrong, they’re going to feel it; and if you do it right, they’re going to feel that too.”
After its release last year, the film quickly gained worldwide attention for its simple, muscular storytelling and stunning special effects — effects made even more stunning by these two facts: (1) Andrew had almost no budget, and (2) Andrew did all of the special effects by himself. “Were there any aspects that were particularly difficult?” we asked. “All of it,” Andrew said. “All of it was particularly difficult.”
Here’s Andrew Finch on how he pulled off some of the most difficult special effects in his brilliant little magic trick of a film, Others Will Follow. (Warning: things get technical from here.)Tools Used:
- DJI Phantom 4 with onboard camera
- Drone
- Blackmagic Pocket Cinema Camera
- PhotoScan Pro
- Maya
- Arnold
- After Effects
- Nuke
- TurboSquid Models
Andrew Finch: The opening city scene has two shots. The first shows a bunch of antennas, then it tilts down into an aerial of the city. I built a drone that could carry a Blackmagic Pocket Cinema Camera, which I used to shoot the second half of that shot. I initially thought I could do the first part with the antennas practically, and then stitch it together with the drone footage. But as it turns out, it’s really hard to find that many antennas. Also, antennas from the ’50s have a specific look. And antennas from the ’60s have a different look. It ended up being easier to buy a bunch of 3D models on TurboSquid and make the entire head of the shot CG. It ended up looking pretty good because they’re basically just tubes and wire, which is pretty easy to make photo real.
In the second shot, I wanted to convey that everyone in the city was watching the same thing on TV. That meant the flickers of the TV lights in the apartments had to be synced. There was basically no way to do that for real, so that sequence was always going to involve some kind of replacement.
I also wanted to show the inside of a foreground apartment with a TV in it, and then slowly reveal a bunch of other windows so the flicker would make sense. It wasn’t practical to find a photogenic apartment in just the right place that would also be willing to let me redo their living room. So I found a spot in downtown Portland that worked for the background buildings, and another building that worked for the foreground building. I used a DJI Phantom 4 to fly around shooting RAW still images of the areas. Then I ran those through PhotoScan Pro to build a textured 3D model.
I positioned the meshes and plotted the camera moves in Maya; and I rendered one pass with a shader that essentially passes through the pixel values in the texture, so all the lighting and shading are exactly as photographed.
For that one foreground apartment, I built the room’s interior with CG models I purchased, and I did a ray-traced render pass with Arnold. Then I shot a plate of myself walking, and I put it in the window because I wanted movement in there, but I didn’t want to try to animate a person. I’m not an animator. I composited all of those elements in After Effects using a 32-bit scene-linear workflow.
Filmsupply: What do you mean by Scene-linear workflow?
Yeah. There are basically two approaches to handling light and color while compositing. You can either throw all your assets into a timeline, ignore what color space they might be in, and just mess with them until you like what you see. Or the other method is to essentially deal with camera footage and CG renders as an accurate photometric record of what light was actually doing on set, then combine or transform light values in ways that obey physics. To do that, you need to be shooting on cameras that record to a known “scene-referred” color space like Log C or BMD Film or REDlogFilm, then transform these color spaces into “scene linear,” which is just a mathematical space where the pixel values correlate linearly with real-world relative light levels.
Getting everything into scene linear ensures everything will match, and it enables image transformations that behave according to physics. Since I’m all about realism, I typically composite in this way so that by default I am making something that is mathematically close to reality. Then I can deviate from that for creative reasons if I want to, rather than blindly searching for something that feels real.
This workflow is essential when you’re working with CG renders. A physically based render engine like Arnold produces scene-linear renders that basically simulate physics using virtual photons. It makes it much more possible to combine a render with a live-action plate and make it feel like they were shot with the same camera.
It’s a tricky workflow to use in After Effects because After Effects isn’t really built for it. Most people would use Nuke or other high-end compositing software — which I do use when AE fails me. But I’ve been using AE for too long and can’t let go.
Were there any aspects that were particularly difficult?
[Laughs] All of it. All of it was particularly difficult.Tools Used:
- Concrete
- 2x4s
- Masonite
- Chicken Wire
- Estes Solid Rocket Engines
- Diatomaceous Earth
- Aluminum
- Stainless Steel Tape
- 3D Printing
- Blood
- Maglite LED Flashlights
- Copper Tubing
AF: The ship is a custom miniature I built from raw materials. There are basically two parts to it: The descent module, which is supposed to land on its legs (but that obviously didn’t work out for them), and the ascent module that separates and returns to orbit. I think the scale was around 1/12 (1 in. = 1 ft.), so the entire miniature is about five feet tall. The ascent module on its own is about two feet long. I spent the most time on the ascent module because I knew we’d see it taking off and then see it close up in orbit. I wanted there to be a lot of detail, and I figured I couldn’t get the level of detail I wanted if it were smaller than two feet. That kind of defined how big everything else needed to be – including the terrain, which I built from concrete and two-by-fours and chicken wire and Masonite. I wanted there to be a fine layer of dust that could be kicked up by the ship’s practical thrusters when it takes off. So I threw a layer of diatomaceous earth on everything. Movie people have creatively termed it “movie dust,” but it’s just really fine dust that’s relatively safe to blow around and breathe. It probably won’t kill you. We still used respirators, though, just in case.
What about the lights on the ship?
Maglite LED flashlights.
Where did you get the design for the ship?
I started off making a simple sketch that didn’t look like much. It was just an idea for the shape. Then I started thinking about where the fuel tanks would need to be, how much fuel they might need, where the crew would be, docking mechanisms, airlocks, etcetera. I tried to think through what the architecture of the ship would actually have to be for a mission like this. It’s a single round-trip mission. There was nothing sent ahead of time. So they would have to take everything with them in one go. They would need a large transit ship for the trip there and back (which we see explode in the film), and then a descent module with a detachable ascent module to go to the surface and back. I wanted everything to be in the right proportions so it was realistic.
What do you have to do in order to make a miniature look real?
Detail. As small as possible and as much as possible. In this case, I was using miniatures instead of CG so I could get all the complex imperfections and specularity that are part of a damaged metal structure covered in dust. It was important to use actual metal if I wanted something to look like metal, not try to fake it with grey paint or something.
Another big reason I went with miniatures was so I could put pyrotechnics in it. I wanted to get real reactive lighting and interactions with terrain dust that would be far beyond my ability to simulate in CG. So the miniature had copper tubing to receive the model rocket engines, and it was wired with igniters. The hull plating was aluminum and stainless steel tape so that it would char but not go up in flames. Because I was moving the miniature and using pyrotechnics and kicking up dust, I had to shoot at a high frame rate to make the physics scale. There’s a calculation you use to figure out the frame rate based on the intended scale. I believe I ended up around 80 fps.
Everything with the launch is practical minus a little bit of cleanup I had to do because the rockets had a lot of sparks, which gave away the scale of the model. Also, they probably wouldn’t be using solid rocket engines on Mars, but they don’t sell methalox thrusters at Hobby Lobby. Elon Musk is welcome to call me and complain.
Zero Gravity
Tools Used:
- Fishing Line
- Wire Rig
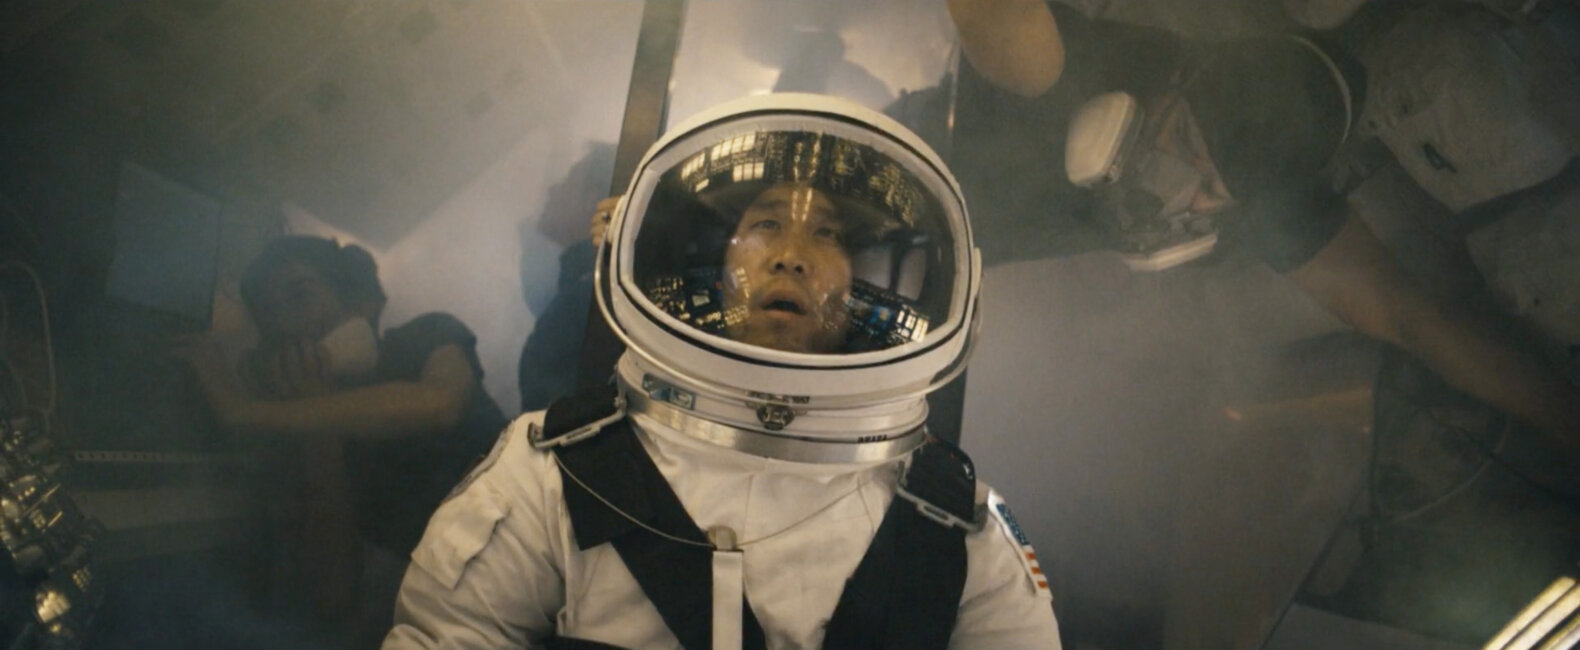
AF: There are only three zero-gravity shots in the film. In the first, we see the main character with three astronauts behind him. One of them appears to be floating on the ceiling. He was just on a wire rig that ran through a hole in the ceiling, with a guy outside counterbalancing. I didn’t even have to do wire removal in post because somehow you couldn’t see the wire. The rest of the astronauts are just mimicking zero gravity. One of them was lying on a box.
The second zero-gravity shot is after the astronaut takes off and he’s transmitting the photo. It looks like he’s floating, but he’s kneeling on the capsule’s chair. Also, the shot is upside down, which helps disorient people and sells it better. I also had the prop camera floating in the foreground, and that was just on some fishing line.
The last zero-gravity shot is of the astronaut floating in space. That one is fully CG. It’s not hard to achieve zero gravity with simple tricks if you don’t see everything in a wide shot or need to do big moves.
Tokyo
Tools Used:
- Sony a7S
- Shogun ProRes
- Maya
- Arnold
- After Effects
- Nuke
- Stock CG Model of Tokyo
AF: One of the most difficult shots in the whole film was the very last one, where it pulls out from an electronic billboard, does a summersault, and then pushes in on the girl. I shot the original footage in Toyko. I basically went there with the actress and a Sony a7S tethered to a Shogun ProRes recorder in a backpack, so I looked like a tourist. I shot the first half by walking down the street and then reversing it so I didn’t have to walk backwards. And then I shot the other half by walking toward the actress.
I planned on doing a tilt under in post to bridge the two together and match the shot I used for the boy watching TV at the beginning. It wasn’t until later that I realized a tilt under was really stupid because you’re looking at asphalt for half the shot. I didn’t have the elements I needed to do the tilt over, so basically everything you see past a certain point is CG until it tilts back down to her. Another problem was that in the original shot, there was nobody in the background because we were there at a weird time of night. Tokyo looked abandoned. So I had to shoot a bunch of people and comp them in. The whole thing was kind of a mess.
It turned out beautiful, though.
Thanks. I’m happy with it. It was really the keystone of the whole movie, so I had to make it work.